
Become a supporter

Dreaming of getting away on a bike trip this summer? cycle.travel’s new multi-day planning feature is here for you!
For any journey of 50km or more, you can simply add an “overnight stop” at any point on your route. These are special via points shown with an overnight symbol; you can drag and move them just like any other via point. Just click anywhere on the route and select "Overnight stop".
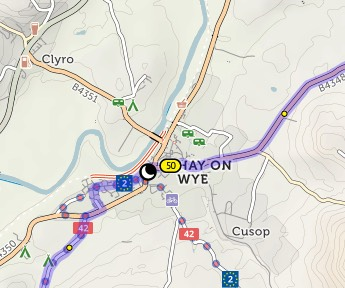
The on-map distance markers restart at each overnight point, so you can easily plan days of the length you want.
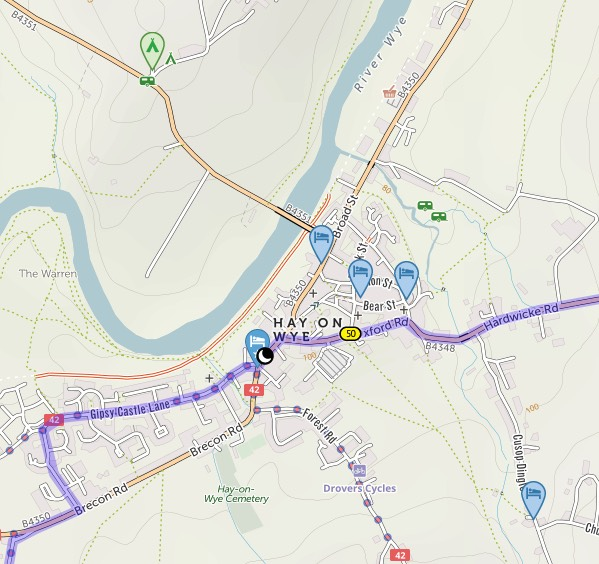
Then, when it comes to finding places to stay for your intended overnight stops, just click “Find hotels and campsites at overnights”; cycle.travel will show nearby accommodation, all clickable for more details, and many directly bookable online.
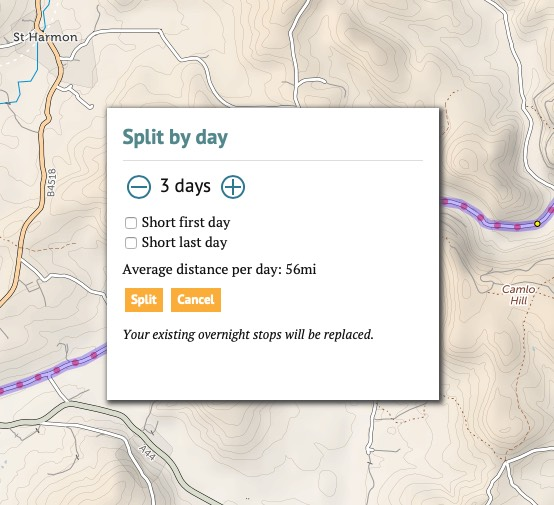
Or if you want… let the site work out the overnight stops for you. Click “Suggest overnight stops”, and set the number of days you want to take. cycle.travel will then add overnight stops at the right places. (You can set your preferred number of miles per day in your cycle.travel account settings, and this will be used as the default.) There’s even an option for shorter first/last days, for when you’re spending part of your day travelling to/from the route.
All done? You can save the route as it is… or you can save it as individual journeys, one per day. Click ‘Split into multiple days’, and each one will be saved and numbered sequentially.
And all this is 100% free for all cycle.travel users – you don’t need to subscribe to a special plan to use this feature. We just want you to have a great bike holiday!
Head over to cycle.travel/map to try out the new feature.

cycle.travel is enormously grateful to Swaledale Outdoor Club for a generous donation that will help to fund new features on the site this winter.
We’re currently working on one of the biggest improvements to our routing yet. The kind donation from Swaledale Outdoor Club will help bring this to the site – and our upcoming mobile apps – even faster.
Swaledale Outdoor Club, based in Richmond, North Yorkshire, encourages and provides facilities for outdoor activities in the Yorkshire Dales and North York Moors as well as further afield. SOC members use cycle.travel to plan their group rides in what is one of the most picturesque and cycle-friendly areas of Britain – famously the location for the opening stages of 2014’s Tour de France.
We’ll have more news on our new feature in the coming weeks – so thanks again to Swaledale Outdoor Club for their support!
The mapping and route-planning feature is powered by cycle.travel.
Our maps are made using open data from OpenStreetMap, licensed under the Open Database Licence; with additional data from Ordnance Survey and from the Department for Transport, licensed under the Open Government Licence (© Crown copyright and database right 2020).
The information on these maps is recorded by volunteers from the OpenStreetMap project. If you see something that’s missing or wrong, you can become an editor at OpenStreetMap and correct it. We update our maps with the latest OSM data approximately every month.
It’s easy to plan a route on cycle.travel then get it onto your phone.
You’ll need an app on your phone that can read GPX files. Such apps include BikeGPX, MapOut (iPhone only), Viewranger, and OsmAnd.
First, click GPS/phone, then Open in phone app, to download the GPX file from our route-planner.
If it doesn’t open instantly in your app, look in your download folder, or the Files area of your phone. You can then click the file and choose the app to open it in. Your planned route will appear in your app as a line to follow.
If you have a GPS unit mounted on your handlebars, you can transfer the file to it. You can either do this via a USB lead connected to your computer, or via a phone app. Your device manufacturer will provide instructions.
There are lots of different formats of GPS file. You can access these by clicking GPS/phone then Download GPS files. GPX tracks are simplest, but you can also choose a ‘TCX course’ which includes turn-by-turn prompts. We offer these formats:
If you have a Garmin GPS unit, you can transfer your route wirelessly if you register free accounts with both cycle.travel (which provides our route-planning) and Garmin Connect. Click cycle.travel to open your route in cycle.travel, then register an account and click the GPS button. there

When planning your route, it’s good to know what the road or track quality will be like.
Clicking on any section of your planned route will open up a popup, from where you can choose to see it in Google Street View. Note that Street View images are mostly only available for roads, not paths.
You can also click “See photos” to see pictures from the Geograph project, which has good coverage of paths.
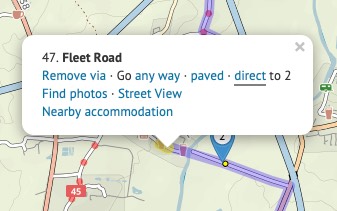
Although our route-planner tries to find the best cyclable route between any two places, there’ll be times when you want to take a direct route that it doesn’t permit – for example, on a new road that hasn’t made it into our mapping database yet.
You can draw a straight line to cross such a section. Put a via point on either side of your intended straight line section. (Don’t worry about the no doubt circuitous route it’ll choose.) Then click the first via point, and in the popup bubble, select ‘Go direct’. The route will change to take a straight line to the next via point.
You can see an elevation profile for any route you plan. Just click the elevation button on the left.
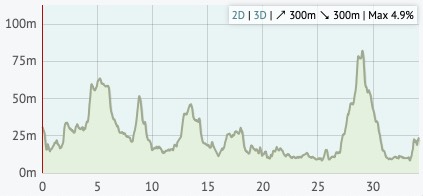
Moving your mouse over the elevation profile will show that place on the map, and vice versa. If you drag the route, you’ll see that the elevation profile is updated as you do. The total climb and descent, and the steepest gradient, are listed in the corner of the profile.
You can even click ‘3D’ to see a 3D elevation profile of the route!

There are two additional buttons on the left: one to reverse your route, one to undo the last change you made.
You can delete all the via points before or after a certain point. This is useful if you’re splitting a long route into several sections. Right-click the point (or click while pressing Command on a Mac), then choose ‘Delete before’ or ‘Delete after’.
We don’t offer the feature to save your route here on the Worcestershire County Council website, but you can transfer it to cycle.travel, the website that powers our route-planner.
Click “Open in cycle.travel” and your route will be transferred across. You can then create an account on cycle.travel and save your route in that account. cycle.travel also offers facilities to print your route.


Made in the Cotswolds. Published by Éditions Système D Ltd.
Log in with your cycle.travel account:
| Password |
Or simply use your account on:
