It’s easy to plan a route on cycle.travel then get it onto a GPS unit.
If you have a recent Garmin GPS cycling unit, we recommend using Garmin Connect to transfer your routes wirelessly.
Make sure you have an account on Garmin Connect as well as your cycle.travel account. Download the Garmin Connect app to your phone, and link it to your GPS via Bluetooth.
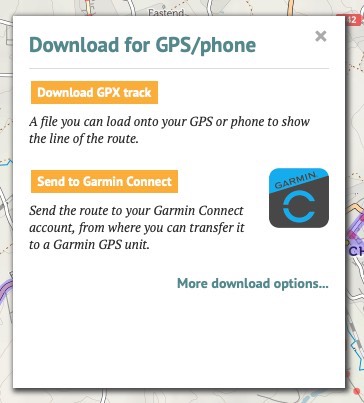
Then on cycle.travel, when you've planned and saved your route, click the GPS button. You'll see this:

Click Send to Garmin Connect. A new window will appear asking you to log in and grant permission to cycle.travel. (You’ll only have to do this once!)
Once you’ve done this, your route will be transferred to Garmin Connect as a ‘course’. The Garmin Connect app on your phone can then transfer it via Bluetooth to your GPS unit.
You can also download a ‘GPX track’ file, which can be read by all brands of GPS and many apps. This will show the route as a line on your GPS screen. Click Download GPX track, and the file will be downloaded to your computer or phone. You can then copy it manually to your GPS unit.
There are lots of different formats of GPS file. You can access these by clicking More download options. GPX tracks are simplest, but you can also choose a ‘TCX course’ which includes turn-by-turn prompts. cycle.travel offers these formats:
If you choose a format with turn icons, you can get cycle.travel to position them slightly ahead of each turn. This means any audible warning from your GPS will sound before you get to the turn. Select TCX course or GPX route, then select Announce turns in advance.
When you download a route from cycle.travel, it will by default simply appear as ‘cycle.travel’ on most GPS devices. To give it a distinct name, save it on cycle.travel before you download it. The name you choose on cycle.travel will be reflected in your download.
You can include elevation data in the downloaded file so that it shows up on your GPS unit. To do this, download from the map page (not your journeys page) and click the elevation button so the graph is showing before you download it. Elevation data can be included in GPX tracks and all TCX files.
Log in with your cycle.travel account:
| Password |
Or simply use your account on: